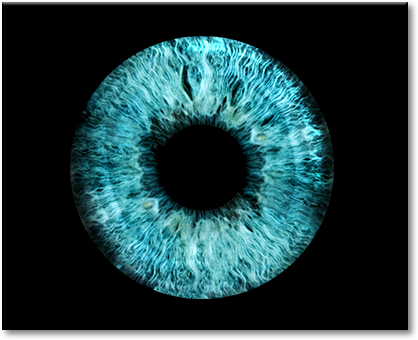
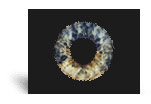
Your iris photo in XXL
Make it yourself for the perfect gift
Download from just $9.95

1. Make iris photo

2. Edit photo

3. Download photo

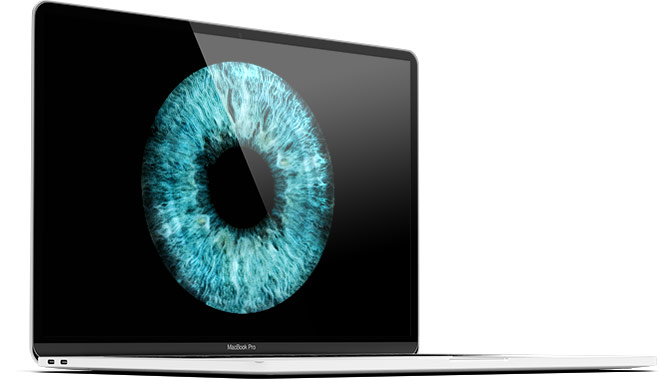
Simply create your iris photo online
Many have already seen and been wowed by iris photos. An iris photo is a personal, individual work of art that reflects the soul. After all, the human eye is unique. As a large-format print, iris photography is the ultimate gift idea and a romantic token of love. But making your own iris photo is really very simple.
Iris photo in 4 steps
Making your own iris photo is much easier than you would think. If you have a model of the latest generation of smart phones or a camera with a macro function, you can save yourself the trek to the photographer. First of all, you have to take the photo. Then it can be edited free of charge in the photo editor. This is how easy it is:

1. The model should stand with their back to the light source. This is to avoid having any light reflections on the eye photo.

2. Hold the camera or smart phone up very close to the eye (3-5 cm). Support the head, either by leaning it against or on something, to reduce movement blur.

3. Photograph the eye straight on with flash so that the flash is in the pupil in the photo. Don’t worry – this isn’t dangerous.

4. This photo is suitable for the editor: the flash (1) can be seen on the pupil (2) and not on the iris (3). The iris must be fully exposed and not covered by an eyelid.
Editing and ordering an iris photo
1. Once you have an eye photo that is sharp and free of any reflections, you can upload it into the iris photo editor.

2. You will use the editor to select the iris, optimise the pupil and increase the colour contrast of your iris.

3. When you have created your iris shot from your eye photo, you can download it in various resolutions.

4. After download you can print out your iris photo at home or at a local print shop.
DIY video tutorial: Doing your own iris photography
Questions?
From what age can children's eyes be photographed?
The colour of children’s eyes continues to develop throughout the first year of life. After that, iris photography is possible but, since the child will have to hold its head very still for the photo and won’t understand the process, we would say that iris photography makes sense after the age of about 5.
How can I edit my iris photo?
If you upload your self-made iris photo into our iris photo editor, you will be able to edit it very easily and conveniently. In the editor, the iris can be selected and cropped, and the colour saturation and sharpness adjusted.
Will iris photography work with dark eyes, too (brown, black)?
It’s more difficult with dark eyes. The darker the eye colour, the trickier it is to have the iris stand out as an art object and to highlight its structures. The best idea is to test it out with your own photos.
Can iris photos also be printed out on canvas, glass or as a poster?
Naturally! An iris photo can be printed out on a wide range of products. We offer your iris photo in ultra-HD resolution so you can have it printed out on all common materials.
Can I download my iris photo as a file?
Of course. After using our iris photo editor, you can download your iris photo free of charge in the web version. If you want to buy your iris photo as a printable file and send it as an e-card, we offer a purchase version in ultra-HD resolution.
Can I take an iris photo myself?
Absolutely. As long as you have a really good smart phone or good quality photography equipment, you can take iris photos yourself, too. Simply use our DIY guide.
Is iris photography harmful for the eyes?
No. Iris photography is absolutely harmless for the eye. This applies to babies and small children, too. The normal daily exposure to light is 100 times greater than that in iris photography. However, we don’t advise iris photography for persons suffering from epilepsy or those who are medically advised to avoid bright light.
Do contact lenses get in the way of iris photography?
No, contact lenses don’t get in the way. Only hard or coloured contact lenses can have an impact on the results. If you want to do your own iris photography, we recommend simply removing the contact lenses before the shoot.
Your iris photo is always unique
The human eye is a unique work of art. This makes an iris photo the most personal of all gifts.
Create your iris photo now –
it’s really very easy!
This is what our customers say:
Tracey K., Augusta
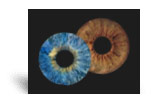
From the shoot in our living room up to editing the pictures – we had so much fun. It looks fantastic. Especially when having completely different eye colours.
Miller family, Boston
The online editor is great and really easy to use. We’ve created 2 eye shots and edited the pictures within seconds. Awesome!
Thomas S., Madison
Never thought that it would be so easy. Had our digital iris photos printed at our local shop. Highly recommended.
Doing your own iris shoot – the family event
If you would like iris photos of the whole family, you can organise a fun family photo-shoot event. A rainy weekend is perfect for this, since direct sunlight and reflections in the shots make getting that perfect iris photo all the more difficult. An iris photo shoot at home with the whole family is a great opportunity to explain to the kids how the eye and iris work. When the parents start off as the photo model, the children will hardly be able to wait until it’s their turn. And editing the eye pictures in our online editor is also a lot of fun for the kids. Important to know: iris photography is completely harmless for the human eye.
Iris photography –
the gift idea
It has never been easier to find a personal and unique gift. There are almost 8 billion people on the planet. But your eyes are totally unique.
Create an iris photo now –
it’s so easy!
Taking photos of your own eye
Eye photography used to be virtually impossible without a professional photographer. But because the cameras on modern smart phones are becoming increasingly more sophisticated, it’s very simple these days to take your own iris photo. To do this, all you need is a smart phone of one of the latest generations or suitable camera equipment.
Iris photography as a gift
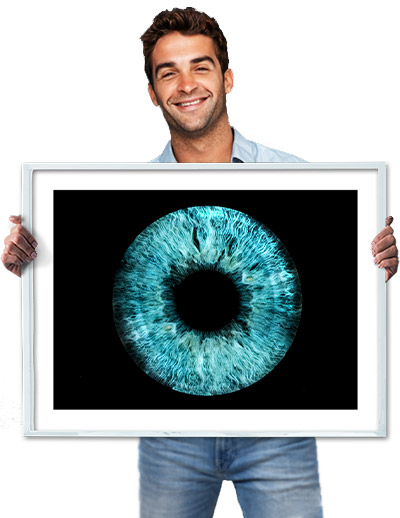
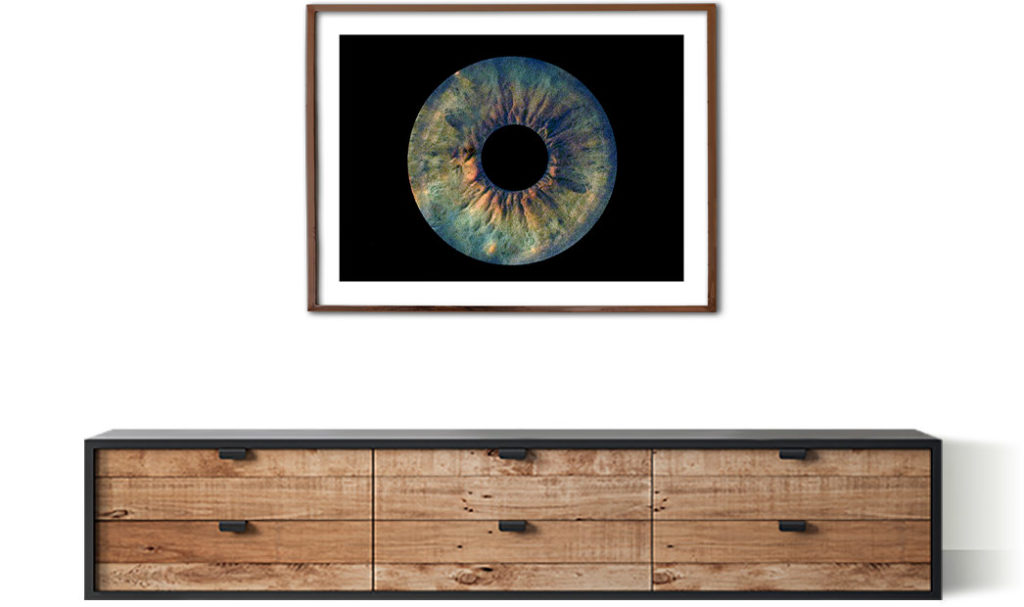
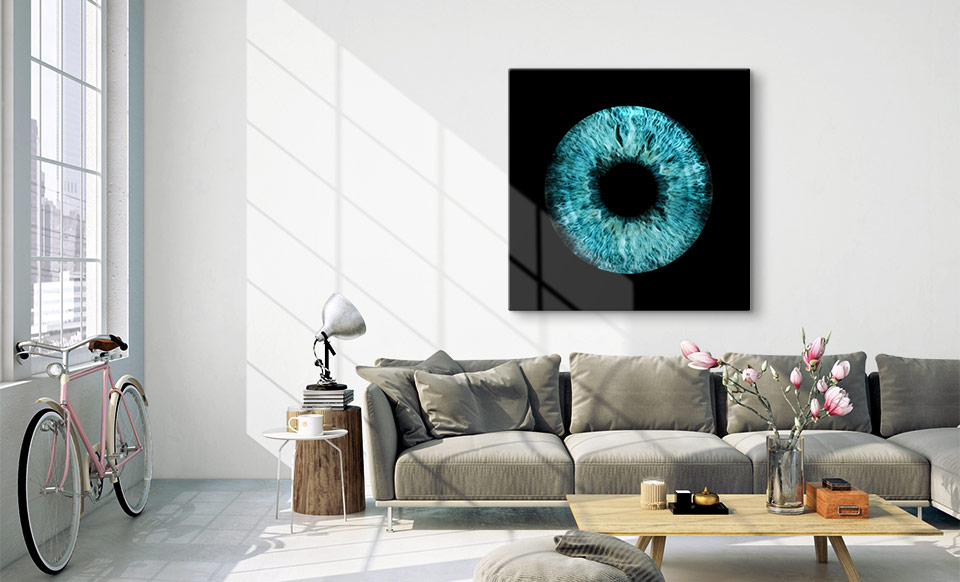
An iris photo is particular popular these days as a romantic gift idea. Once you have created a high-resolution photo of your own eye, you can have this printed on high-quality materials in large format. An iris photo on canvas is the most popular but if you would like to give someone an especially high-quality gift, you should take a look at prints on acrylic glass.
Dos und Don'ts
- Take photos that are free of reflections
- The photo has to be high-resolution and sharp
- Create the desired result using the iris editor
- The eyelids mustn’t cover part of the iris
- Take several photographs to get the optimal image
- ATTENTION: Don’t photograph yourself if you have health problems
Iris photography in 8 steps
You need a high-quality smart phone (see above) or a DSLR camera with a macro lens.
You need a room with no direct light sources. If a light source cannot be avoided, the model should be placed with their back to the light source.
Since nobody can really sit absolutely still, the photo will be sharper if the model’s head is leaning against or on something.
The model holds the eyelids open with the fingers so that the complete iris can be seen.
Now, move the camera lens – with macro function and flash on – up very close to the eye (2-3 cm), focus and shoot.
Repeat as many times as it takes to get a sharp, reflection-free photo.
If you need several attempts, take a break in between.
You can then upload your sharp iris photo into the iris photo editor and process it there.
Iris photography
The saying goes, the eyes are the window to the soul. Naturopaths say that the iris can provide hints about ongoing or future illnesses. The human iris is the perfect security key, and thus replaces passwords and fingerprint recognition, say researchers. The fact is: the human eye is something truly extraordinary. Iris photography allows every individual’s uniqueness to be captured. The iris photos are edited without distorting the structure and colour. The finished image is then printed on canvas, Alu-Dibond or acrylic glass for a high-quality and unique artwork of the “window to the soul” in large format.
Iris pictures: the iris photo is the new portrait photo
What could be more intimate and honest than a look into the eyes of another person? Portraits are made for a wide range of occasions: for souvenirs of family celebrations, weddings, christenings, births, as erotic “boudoir” shots or in the commercial context. Iris photography is the ultimate close crop since it only depicts the unique coloured part of the eye – the iris as a photo. The finished photo is edited to better highlight the uniqueness, but the structure, colour and character remain true. This makes the high-quality print of an iris photo especially suitable as a token of love for your partner, as a unique gift for the grandparents or simply as a very different family photo.
The iris: unique and (virtually) unchanging
There are 7.8 billion people on the planet – that’s more than 15 million eyes and none of them are identical. Not only is the iris of every individual unique: the left and right eyes of every person can also be clearly differentiated from each other.
The uniqueness of the eyes fascinates both romantics and scientists alike. Whether we now gaze with fondness into the eyes of our partners or our children, we are quite sure that they are unique and reflect the personality of our beloved. Doctors, too, can read a lot of information about the health of a patient from the markings, structure, pigmentation and colour shifts.
Modern scientists searching for counterfeit-proof biometric data believe they have found in the human iris what they have been looking for, since, even if the iris changes over time, these changes are negligible and barely detectable on an iris photo. Even barely distinguishable identical twins can be told quite clearly apart using iris recognition methods.
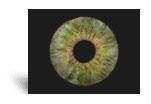
Blue, brown, green or grey: the diversity of eye colour
It is commonly accepted that there are four eye colours: blue, green, grey and brown. But this is an extreme simplification because, just as the structure in every iris is different, there is a huge diversity in the chromatic composition. This diversity is highlighted in iris photography. To understand this, a look at how the different eye colours come about is necessary.
The colour of the iris depends on the concentration of the pigment melanin. Originally, all humans had brown eyes and blue eyes came about through a genetic mutation. The huge variety of different eye colours first became possible after the appearance of this second eye colour. In Central Europe, babies almost always have blue eyes when they are born. Melanin is first produced in the course of the first year of life, meaning that the eye colour in small children can still change. The final eye colour can be blue, green, brown, grey or one of a multitude of combinations of these four colours.
The special features of iris photography
As you will already know now, the uniqueness of the iris is only apparent on close inspection. After all, it’s the tiny colour nuances and fine structures that make every iris individual. In most cases the iris image will be highly magnified to create a unique artwork of your eye.
An iris photo shoot therefore always involves detailed shots with the appropriate degree of sharpness and in a high resolution. An iris photo is thus an example of the macro genre of photography. This means: small things are photographed in such a way that they can be printed to a high quality even when blown up to large formats. This way, the details in the human eye that ordinarily go unnoticed are made visible. This extreme enlargement is what makes macro photography in general and iris photography in particular so attractive.
The required resolution of the iris photo will depend on both the size of the desired print and the selected material. As a rule of thumb, you can assume that an A3-size print requires a photo with a resolution of at least two million pixels. If the print should be larger – and this is often the case – correspondingly, the resolution will have to be greater.
Doing your own iris photography at home
Iris photography with the smart phone: Generally speaking, you can take an iris photo simply with a smart phone. To do this, you will use the phone’s main camera, since on most models the selfie-camera provides lesser picture sharpness and lower resolution. Hold the smart phone as straight and as close to the eye as possible for the shot. If your smart phone camera has a macro function, you will be able to get up very close to the iris. The eye must be open wide so that the iris isn’t partially covered by the eyelid. This will be easiest if the model tries to look surprised.
Close-up iris photography by a photographer:
If you don’t feel confident about taking the photo yourself, you can have an iris photo taken by a photographer in just a few minutes for around 50 euro. An appointment will usually last for approximately 30-45 minutes. To have the photo taken, you will rest your head on a fixture something like what you might know from an optometrist. Your eye will be illuminated for the shot – while this might become a little uncomfortable after a while, it is not harmful to the eye. The important thing is that the photographer knows their craft and gets the shots in before your eye starts to water. A teary eye would mean blurring in the images and would compromise the results.
A unique work of art: your iris photo as a high-quality print
The size in which your iris photo is produced, as well as the material on which it is printed and the process used, is purely a matter of personal taste. Canvas, aluminium and acrylic glass are just three of the high-quality forms of presentation suitable for iris photography. It is also possible to produce “iris group photos”: here, the irises of the whole family are presented together in one image.
Iris photography with the smart phone
Smart phone cameras have become much more advanced in the last years in particular. These days, devices with multiple lenses dominate photo quality test reports. But even smart phones with just one lens can take perfect iris photos. You can buy cheap clip-on lenses for these devices that are ideal for taking your own iris photos. This will turn your old smart phone into a super-camera because, with the right clip-on lens for just a few euro, your old device will hold its own with the latest technology.
Your own iris photographs with a DSLR
Of course, a DSLR is in a whole other league in terms of photo quality compared to a smart phone camera, even when the smart phone manufacturers rave about their integrated cameras as a new wonder of the world with every model update. Naturally, DSLRs are a huge leap beyond mobile phone cameras.
The advantage of the DSLR over the mobile phone – the larger body – is a disadvantage when it comes to iris photography, however. While there are, of course, excellent macro lenses available for SLRs, the fact that the flash is directly beside the camera lens in a smart phone camera makes it possible to flash the smart phone right in the pupil. This is not possible with the integrated flash on a DSLR. If the flash reflection ends up hitting the iris, this has to be removed in the editing process. Most iris photo studios have no problem simply correcting reflections and in-the-way eyelids in photoshop. This does mean, however, that the iris photo is not an exact replica of the anatomical reality of the eye.
If you don’t have access to a special flash system and softboxes, you’ll need a location with diffused lighting and without reflecting light sources. The settings we recommend for do-it-yourself iris photography are a high ISO combined with a short exposure time. Here, too, applies: if you tinker around, you’ll find the ideal setting, especially when you take note of our instructions.
You’ll find a video on iris photography with a DSLR here.
